Monday, October 17, 2011

Harbour House - A Review


One day when I'm big, I'm gonna have a house that looks like this...

Sitting by the window, at table 3, looking down as the waves crashed against the rocks, I felt content... this now, this is what I wanted - to be served delicious food and to be lulled by the rhythmic chanting of the waves.


Inspiration took me by the hand and guided me around the room; I was a woman possessed, I had to take pictures - there was beauty everywhere I looked; from the picturesque setting, to the lazy seals, even the weathered paint on the outside walls seemed romantic. And the beach-house effect... that was just home to me.


Harbour House is situated in the quaint fishing village of Kalk Bay. The unassuming location transports you to a time when everything was done by hand and the clock stands still, for just a moment longer...

As I walked along the pier, I drifted to Greece or Italy, so beautiful were the surroundings - this was an enchanted world where anything was possible.


The right thing to do in such a setting would be to appreciate the gifts from the sea, in all their glory - and that is what I did.

For the month of October, Harbour House is running a special - two courses for R140 or 3 courses for R160 - this is great value as the portions are generous.

I had mussels to start is a gloriously flavourful sauce of garlic, onion, thyme, white wine and cream... I went straight to my happy place with the first mouthful! The simple flavours, when combined, seemed to sing in my mouth.


My main was Sauteed Paprika Calamari with black olives, caper berries, lemon zest, garlic and chilli. Served with savoury rice. This was a treat for the senses: the colours burst on the plate and the flavours were fresh and uniquely defined.


One of the desserts on offer was a Strawberry Layer Cake with fresh strawberries and creme anglaise, I didn't taste it, but I heard the murmurs of happiness.


The winelist is extensive with some unique choices, by the glass. I had the Glen Carlou Chardonnay, which is lightly wooded, with yeasty notes and subtle hints of tropical fruit.

Harbour House at the V&A Waterfront is said to be opening next week. I personally can't wait to go and make some new memories there!

Monday, October 3, 2011

Chicken Pad Thai


Thai food speaks to my soul.

The balance of flavour that is quintessential to Thai cooking is comforting in a world that is a little off balance. I love the fact that I have the power to control this balance of sweet, sour, salty and spicy and lift a dish from appetising to magnificent with a few tweaks - a splish of this and a shake of that.

This practice can be applied to our own lives; by making simple, positive adjustments - we can find harmony and happiness. The ingredients to this balance may be trickier to come by - but the secret is to stop and listen to our souls' whisperings and tweak as necessary.

The majority of Thai food is a sanctuary for the gluten intolerant as the focus seems to be on ingredients such as rice flour, corn starch and soya, instead of wheat.

I first tried Pad Thai about a month ago, when I visited Chef Pons. Since then I have come to realise how much of an institution this restaurant is to Capetonians and I believe it is because they have the balance just right. Not only the flavours, but the decor, service and ambiance too.

I was delighted by the freshness and the lightness of this dish and have found myself, on numerous occasions, daydreaming about the taste sensations that I experienced.
  

Chicken Pad Thai:
(Serves 2)

Recipe courtesy of Eat In

Ingredients:

250g Thai rice noodles
2 chicken breasts, thinly sliced

Marinade for chicken:
1 tsp cornstarch dissolved in 3 Tbsp soy sauce*

Thumb size piece of ginger, minced
Fresh red chillies (I used green)
3 cups bean sprouts
1/4 cup chicken stock

Pad Thai sauce:
3/4 Tbsp tamarind paste*, dissolved in 1/4 cup warm water
4 Tbsp fish sauce* (I thought this was a bit much so used 2)
1/2 Tbsp dried chilli
3 Tbsp brown sugar

Garnish:
3 spring onions, sliced
1/2 cup coriander leaves
1/3 cup crushed peanuts*
Fresh lime or lemon juice

*Some soy sauces contain gluten
*Tamarind paste, fish sauce and peanuts all contain yeast

Method:

  • Bring a large pot of water to the boil and remove from heat. Dunk in the rice noodles. Allow noodles to soak. Noodles are ready when they are soft enough to be eaten, but are still al dente. Drain and rinse with cold water. Set aside.
  • Combine the Pad Thai sauce ingredients together in a small bowl. Stir well to dissolve the tamarind paste and brown sugar. Set aside. (This may seem like a lot of sugar, but you need it to balance out the sourness of the tamarind - this balance is important).
  • Marinade the chicken in cornstarch and soy sauce for about 30 minutes. Warm up a wok or large frying pan over medium-high heat. Add 1 tablespoon of oil. Fry chilli and ginger for 30 seconds. Add chicken, with its marinade. Stir-fry for 1 minute. When wok/pan becomes dry, add a little chicken stock.
  • Add the noodles, and pour the Pad Thai sauce over. Using tongs gently stir-fry the noodles for a minute or two. Add the bean sprouts and season with the pepper. Continue stir frying until the noodles are soft. (Around 2 minutes). Add a touch of stock again if it seems too dry.
  • Top with generous amounts of fresh coriander, spring onion and chopped nuts. Squeeze the limes over the top.

Wednesday, September 14, 2011

Gluten Free Shortbread - WARNING: Crumbly, Creamy, Addictive!!


Wow, I am in love with this recipe!

It has to be possibly the best thing I've ever made - gluten free. I say that every time, don't I? ;-) But no, REALLY, this shortbread is AMAZING!

And it lasts a long time (if you are strong enough not to give into temptation ;)) Generally, baked goods made using gluten free flour, go stale after a day or two, but this shortbread can last up to a week or even longer if sealed in an airtight container.

Doesn't it just make the most adorable gift too?

At last week's Neill Anthony Masterclass, he made a dessert of Strawberry Shortbread with Vanilla Creme Fraiche, which was insanely yummy.


I couldn't wait to attempt my own gluten free version!

I discussed baking gluten free a few weeks ago, over here, where I mentioned the ratios of the different flours: Heavy, Medium and Light.

For biscuits the ratio is generally 1 Medium; 1/2 Heavy; 1 Light.

Gluten Free Shortbread:

Ingredients:

150g Butter (For a dairy free version use Blossom Margarine)
90g Caster Sugar (For a slightly healthier version substitute with Fructose)
100g Rice Flour
50g Almond Flour
100g Maizena (Corn Starch)

The almond flour adds a lovely nutty flavour and texture.

Method:

Heat oven to 180 degrees Celsius
Cream butter and sugar
Add flour slowly and mix well until you have a soft dough
Roll out dough gently onto parchment paper and the same baking tray you will be putting into the oven (make sure it fits into the fridge too)
Set the rolled out dough in the fridge to rest for half an hour
Bake the shortbread for 15 minutes or until golden brown
Cut into squares while still hot

To make the rest of Neill's dessert:


Slice strawberries in half, depending on the size, sprinkle with a little caster sugar or fructose and add to a hot pan. Cook until strawberries have softened.

Construct dessert by placing strawberries at the bottom, a piece of shortbread on top and then finish off with a dollop of creme fraiche, speckled with vanilla seeds.

Simple, yet so effective and delicious!

Monday, September 12, 2011

Friends for Dinner - A Neill Anthony Masterclass

 
The reason I love these Masterclasses, is not because of the expertly prepared food, or the excitement at trying new wines that are painstakingly paired with the courses, or the NoMU, Willow Creek and Bosch gifts, or the other giveaways during the night (although these reasons on their own should be enough to entice you to come along :)) But, for me, these evenings are about the people...

The feel is of a casual dinner party - the guests being a collection of amazing personalities, all with a story to tell. If I don't know them at the beginning, I always feel that by the end, I have made a friend. And Thursday, 8th September's, Masterclass was no exception!

The demonstrations are another highlight. I enjoy the relaxed way that Neill guides us through his menu and thought processes and encourages us to get hands on while he shows us how to make each course.

 
His passion for food is evident in each action and statement.

Neill's ethos is to use only locally produced, seasonal and ethical ingredients. Therefore, you know that what you are eating is of the highest quality.


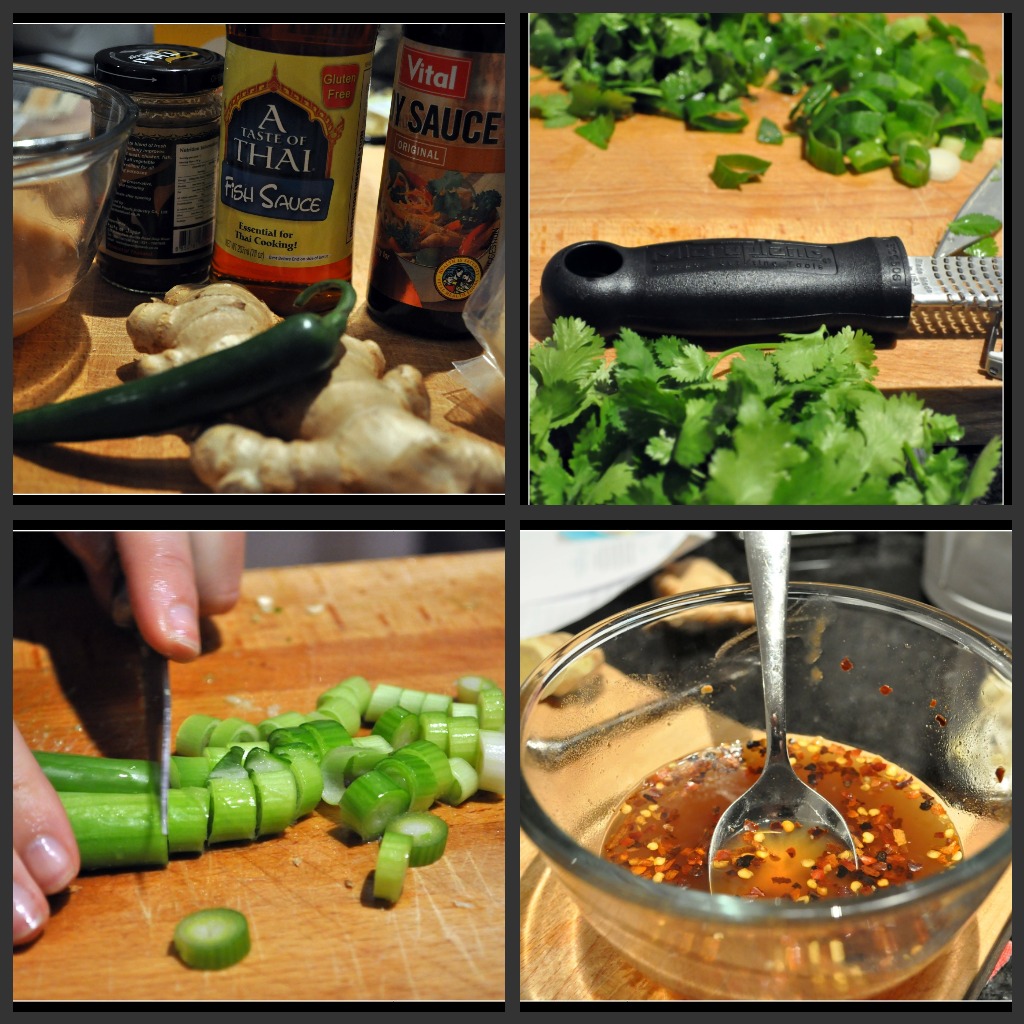
For starters we had Grilled Courgette Soup with Aubergine Tortellini. Char-grilling the courgettes adds another dimension to these otherwise fairly bland veggies and by blending in a high speed blender, the soup becomes creamy, eliminating the need to add too much cream.

I never realised how much effort went into making pasta; for the kneading alone you need to be strong, really strong! And you have to be quick and not over-knead because if it cracks, it's ruined.

This Masterclass was a rather special one as we were privileged to be the first members of public to see and taste Mad Hatters' wine. The name is symbolic of the various hats we wear on a daily basis, be it at work, home or while socialising. Each wine is based on a different region of the world, and is designed to educate South Africans on interesting cultivars.

 
The wine that was paired with the soup was called Roussane Grenache Blanc, which is a French-style light wine. It has a buttery feeling that complimented the creaminess of the soup. The palate is soft citrus and the nose is reminiscent of flowers. The French saying "Joie de Vivre" or Joy of Life captures the essence.

My thoughts on the first dish: The wine, a little crisp to begin with, became instantly smooth when in contact with the soup. The soup on its own was subtly delicious, but a triumph when combined with the smoky, earthy and zesty flavours of the aubergine tortellini. 


Andre Pentz is THE wine man; his reasoning behind the pairings and his enthusiasm for all things wine and food related is infectious. He leaves you eager to take that first sip of wine... and to carry on sipping. ;)


Matt Manning is the Sous Chef at La Colombe, which has been rated as one of the top 10 restaurants in South Africa. He is Neill's right hand man during these Masterclasses and is doing unbelievably well for himself at such a young age.

 Above photos courtesy of Jon Meinking

Together these three men make an unstoppable team! 

The main course was Pressed Pork Belly with Olive Oil, Lemon Potato Puree and Seasonal Greens. The pork belly is cooked slowly to produce the best result. It is firstly placed in a 10% salt brine over night to draw out all the excess water, which is then rinsed off. The pork belly is then pressed and rubbed with NoMU Coffee Rub and cinnamon and roasted for 8.5 hours.

The seasonal greens that accompanied the pork were called Bright Lights and according to Neill, "Very Cape Town" due to their psychedelic colouring... no points for guessing why :)

The crackling, for me, was most certainly the highlight as it conjured up memories from my childhood. It is amazing how food has the power to do that!

The crackling is also cooked very slowly over a period of 6 hours and the oil continuously drained off so that what is left is just the crispy, delightfully salty skin.

This course was paired with Mourvedre, which is a full bodied wine of Spanish descent. The wine evokes the grace and power the Spaniards exhibit while dancing the Flamenco.

My thoughts on the main course: The tenderness of the pork although in direct contrast to the zingy mash, made a surprisingly joyous pairing, while the richness of the gravy rounded off the dish. The lemon cut through the slight harshness of the wine (due to it only having been in the bottle for 3 weeks), whose gingery and peppery notes, brought out the coffee flavours of the pork. The end result was harmony on the tongue.

"If ever I'm on death row, I want Neill to make this gravy for me!" Exclaimed Dawn Jorgensen after her first taste. An impressive compliment, wouldn't you say?


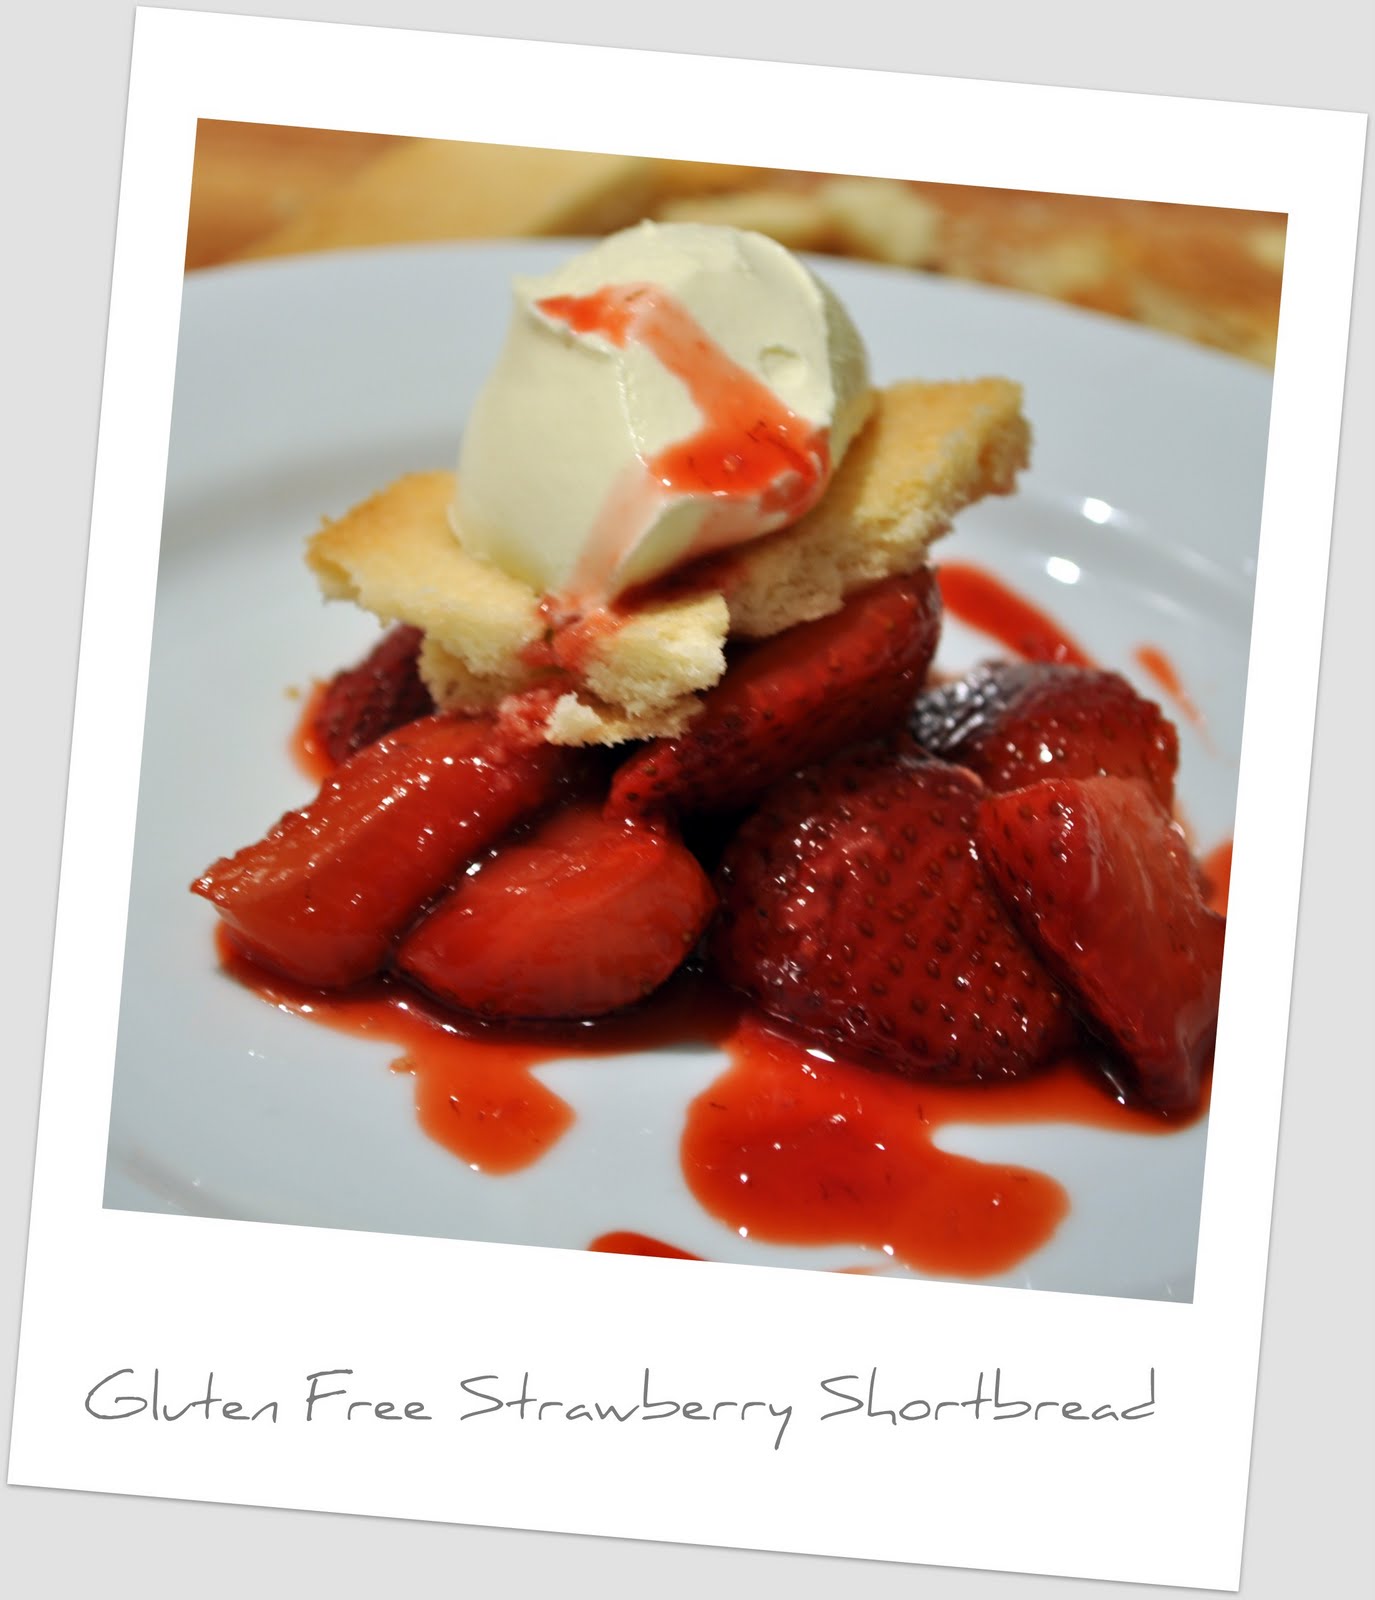
The final course was Strawberry Shortbread with Vanilla Creme Fraiche. Resting the pastry once it has been rolled is imperative. Due to its high butter content, the pastry will split if this step is not followed. Macerated strawberries (softened or broken into pieces using a liquid), creme fraiche, speckled with seeds from a vanilla pod and an extra special sprinkling of salted peanut brittle made up the remainder of the dessert.

This dish was paired with Bovlei Gewurztraminer. An off dry wine with litchi flavours. 

My thoughts on dessert: When combined, each component of the dish united magically - the salted peanut brittle tied the whole dish together, resulting in a marriage made in heaven. The wine, an atypical dessert wine, although delicious on its own, in my mind, needed to be slightly sweeter to break through the tartness of the strawberries. 


And as all good things must, so ends another enlightening Masterclass...

Jokes fly, wine flows, cutlery clinks and laughter rings out as food is devoured by friends, new and old.

For more information Contact Neill Anthony on info@neillanthony.com or 072 584 7851 or on twitter @neillanthony.

Tuesday, September 6, 2011

French Onion Soup with Gluten Free Cheesy Croutons

 
It was an icy day in Paris; the streets were glistening and I was huddled into my giant hooded jacket. The wheels of the bus were crackling on the wet tar as we sat at the top of an Open Tour bus, gazing at the many beautiful sites, while our breath turned into chilly smoke (can you say tourist?).

Suddenly, the skies opened, showering us with sleet and other gifts from nature. Freezing, and looking a little like drowned rats, we jumped off at the nearest stop, which happened to be close to the Eiffel Tower, and raced into the closest cafe - teeth chattering. I needed warmth and comfort and I needed it NOW! While briefly checking the menu, my eyes rested on French Onion Soup and I thought, "Hey, when in Paris..."

As my soup arrived, I spied the floating islands of cheesy toasted bliss above a sea of brown and smiled.

Yes, I was happy to see those cheesy croutons as I wasn't expecting them, but I couldn't eat them all the time - in order to make an "authentic" French Onion Soup, I decided to make my own. 


French Onion Soup: (From NoMU Website):
Serves 6

Ingredients:
10 large brown onions
80g butter or olive oil
2 garlic cloves, finely crushed
2 tsp NoMU Provençal Rub
1 cup white wine
2 litres prepared NoMU Beef Stock
NoMU Just Salt
NoMU Just Pepper
18 slices of French baguette (see recipe for the gluten free bread below)
200 g Gruyere cheese, finely grated

Method:
  • Grind the Provençal Rub in a pestle & mortar or spice grinder.
  •  Halve the onions and slice each half into thin slices.
  • Melt the butter in a heavy based saucepan and add the onions, garlic, a pinch of salt and Provençal Rub.
  • Sweat the onions until translucent, stirring quite regularly.
  • Add the white wine.
  • Once the alcohol has evaporated, turn down the heat to low, cover the onions with greaseproof paper and continue to cook very gently until all the natural sugars in the onion have caramelized and the onions are soft and sticky. This can take 30-60 minutes.
  • Add the hot beef stock.
  • Bring the soup up to a boil and skim off any froth and oil that rises to the surface. Return the heat to a slow simmer and cook for another 45 minutes. At the end of cooking, season the soup with salt and black pepper.
  • When ready to serve the soup, toast the baguette slices on one side under the grill in the oven. Turn around and cover the other side with Gruyere. Grill until the cheese is golden and bubbling. Serve the soup in warm bowls topped with the Gruyere croutons. Serve at least 3 croutons per person.


Before Attempting this beer bread - please read the below - if you have Coeliac Disease I would recommend that you do not make it, although there seem to be very contradictory views on the subject.

 According to Vital, "Windhoek Light and Bavarian Brau are apparently made using the German method of distillation which is supposed to eliminate the gluten from the fermented grains." Budweiser also claims to be gluten free.

From Wikipedia, "Some brewers feel that beers brewed mainly from cereals such as rice, sorghum, buckwheat and corn (which either contain no gluten or contain glutens that do not trigger an autoimmune response in coeliacs), and including a proportion of barley or rye, are safe to drink. These brewers argue that the proteins from barley are converted into non-harmful amino acids. Statements from brewers show that their scientists feel confident that their product is non-harmful to those who are gluten intolerant. However, there is some concern and evidence that the claim is not true. Although the barley hordeins in such tests may not be detected, smaller pieces of these proteins, known as peptides, may remain and be toxic for coeliacs. However, while it is likely that most coeliacs will be able to drink beer with less than 20ppm such as Budweiser or beer made with rye malt (in moderation) without causing themselves any harm, it is likely that each person has a different level at which an autoimmune response will be activated and there is some debate over the gluten "level" acceptable to coeliacs.  There are brewery statements that "normal beverages" such as Budweiser are safe, tempered with advice that they should be drunk with caution."

This recipe is modified from the amazing Ishay's blog - Food and the Fabulous. I wanted a simple recipe and this one seemed to tick all the boxes.

Beer Bread with Lemon and Thyme:

Ingredients:
2 Cups Sifted Glutagon Cake Flour
1 Cup Sifted Maizena
2tsp Baking Powder
1tsp Baking Soda
2tsp Salt
50ml Sugar
340ml Bottle Beer (Windhoek Light)
1/2 Cup Oil (I used Canola)
Zest of 1 Lemon
Juice of Half a Lemon
1Tbsp Thyme Leaves, removed from stalks

Method:
  • Preheat oven to 190 degrees Celsius
  • Grease a standard baking loaf tin
  • Mix all ingredients together, until well combined
  • Pour batter into tin and bake for 1 hour or until skewer inserted into centre comes out clean (My bread took 35 minutes, but I am assuming it is because I had the fan on)
  • Allow to cool for 20 minutes before turning out onto wire rack

Wednesday, August 31, 2011

Coconut Chocolate Ice Cream on RSG with Nina Timm


The lovely and uber talented Nina Timm from My Easy Cooking blog asked if I would like my blog to appear on the radio station, RSG 100-104fm, during the show where she chats about food bloggers and their blogs - of course I said, "YES PLEASE"!!

This morning, I had the pleasure of making my chocolate ice cream, which I originally blogged about here, in Nina's kitchen. Nina is an unbelievable lady - she is the most kindhearted person and is extremely generous with her time and the "secrets" that she has gained through cooking, blogging and photography. I could listen to her recount stories, all day. It was an absolute joy and a privilege to spend the morning with her. Thank you Nina!

What makes this ice cream so special is that it is dairy and egg free, but still rich and creamy, and extremely simple to make. It also serves as a base for wonderful flavour combinations such as chocolate and orange, chocolate and mint or chocolate and nuts.

As Nina and I also discovered these same ingredients would make a wonderful chocolate sauce or chocolate pudding - your imagination is the limit!


Coconut Chocolate Ice Cream
(Makes about half a litre)

Ingredients:
2 Cups Full Fat Coconut Milk
1 Slab Albany Smooth Dark Chocolate
1 - 2 tsp Vanilla Extract or 1 Vanilla Pod with seeds removed and used
1/2 Cup Sugar/ Fructose/ Xylitol (sugar alternatives)
2 tsp Good Quality Cocoa such as NoMU

Optional Extras: Pecan Nuts/ Walnuts/ Fresh Mint/ Orange Extract or Rind
As a chocolate alternative try using the Woolworths Organic Dark Chocolate and Orange

Method:
  • Combine all ingredients in a pot on the stove
  • Slowly heat, while stirring, until the chocolate has melted
  • Bring mixture to a gentle boil for about 20 minutes
  • Add any extras at this point and stir to combine
  • Transfer to a freezer container
  • Freeze for a minimum of 2 hours

    Tune into RSG 100-104fm tomorrow morning, just after 9am, to listen to Nina.

    Monday, August 29, 2011

    Butternut and Mushroom Risotto


    For some reason, the popular consensus about rice is that it is a gluten grain. Rice is NOT a gluten grain, it contains starch yes, but is in fact 100% gluten free and easily digested by the body, without fermentation, which makes it one of the best food stuffs to eat if you are intolerant to gluten.

    I love risotto, but the laborious task of whisking and stirring and waiting for the stock to absorb, and waiting and waiting and waiting some more, is a bit of a turn off - therefore when Neill Anthony, personal chef, mentioned that he had a short cut for risotto, the same method used in Gordon Ramsay's kitchen, where he trained, I was most intrigued.

    The secret is to boil the rice for 7 minutes and then not to rinse the starch off before using it. This little tip takes the mission out of making risotto and provides the same results - how cool is that huh?? :)

    With the rice sorted, let's move on to the second most important ingredient in a risotto - the stock.

    Have I mentioned to you yet, the reason why I love NoMU fonds? No? Ok - well here are the many reasons: Firstly, a fond is described as concentrated stock. Not only are NoMU fonds free of artificial flavourings, colourants and preservatives, but they are gluten free too. This is such a relief to me - because yes, it is possible to make your own stock, which is what I have done in the past as most stock cubes and powders contain gluten - but NoMU fonds taste so great, that it is no longer necessary to do.

    YAY for NoMU and their delightful fonds, which come in a variety of flavours; vegetable, chicken, beef and lamb.

    Now that we have two brilliant time savers - let's make this speedy risotto - chop, chop!

    Taken from website


    Butternut and Mushroom Risotto:
    (Serves 2 - 4)

    Ingredients:
    250g Arborio Rice
    500g Roughly Diced Butternut
    20ml NoMU Fond (I used Beef)
    250g Sliced Brown Mushrooms
    20g Dried Exotic Mushrooms (I used Chanterelle), Rehydrated with Liquor Reserved
    1 Diced Onion
    4 Tbsp White Wine
    2 - 4 Tbsp Grated Hard Cheese, such as Parmesan
    2 - 3 Tbsp Butter
    Olive Oil for Frying

     Method:
    • Rehydrate dried mushrooms and reserve the mushroom liquor - should take about 30 minutes
    • Boil butternut in enough water to just cover the cubes until broken down and puree-like
    • Add the NoMU Fond and the mushroom liquor to the butternut - make sure that you have about 600mls of liquid here as this is going to be your stock
    • Boil the rice for 7 minutes, drain but don't remove the starch
    • Fry onion in olive oil, until translucent
    • Add half the sliced mushrooms and the exotic mushrooms and continue frying
    • Add the rice and cook for about 2 minutes
    • Add the wine and cook until it has evaporated
    • Add the stock a ladleful at a time, it should absorb quickly - the rice should take about 10 minutes to cook
    • Fry the remaining mushrooms in butter, salt, pepper and garlic (if desired)
    • Add to the risotto with the cheese and butter
    • You may also like to add some chopped flat leaf parsley
    • Serve immediately with a final grating of cheese

    Tuesday, August 2, 2011

    Tips for Allergen Free Baking

    The top allergens in baking are nuts, milk, gluten and eggs. 

    It is not always possible to eliminate all allergens at the same time, during baking, as the texture of the product may be drastically altered.

    But, here are a few tips when baking without them: 

    Milk:

    Goat’s and sheep’s milk are not possible alternatives to cow’s milk because they all contain casein, which means that the immune system is unlikely to differentiate between the different milks.

    Substitutes are soya milk, rice milk, almond milk and coconut milk.  Although, soya is closely linked to nuts.

    The texture and even-rising of baked goods such as cakes, cupcakes and quick breads is achieved by creaming butter and granulated sugar; margarine is the easiest substitute in these recipes. Most margarines contain casein, however, therefore reading labels is important. Blossom is one of the few margarines that doesn’t contain dairy. 

    Oils, such as Canola, generally work best in recipes that use liquid sugars such as honey, maple syrup or molasses; combined with a baking agent, a solid fat like ground nuts and an emulsifying ingredient like eggs or an egg substitute.

    When using oils it is advisable to start off using one or two tablespoons less than the amount of butter that would have been used.

    Oil-based vegan and dairy-free cakes that do not use eggs are often a little dense. This can be remedied by combining oil with a solid fat, such as ground nuts or chocolate. For example, combining melted dairy-free chocolate, oil and soya yoghurt with dry ingredients allows the cake to remain moist and rich.

    Replacing butter with margarine in biscuit and shortbread recipes usually works as the butter is used for richness and density and not for the lift. Oil can also be used in these recipes, with the correct combination of ingredients. 

    Applesauce and other fruit purees or jams add body and moisture to batters and can be a healthier alternative to using fats. 

    Gluten:

    Alternatives to wheat include corn, rice, quinoa, amaranth, millet and buckwheat. 

    Gluten-free flours are generally light, medium or heavy in texture.

    The heavier grains tend to contain more protein. Flours like buckwheat, quinoa, millet, cornmeal, nut meal, and bean or legume flours are similar to baking with whole-wheat flour.

    Medium flours are similar to all-purpose flour; these include sorghum and superfine brown rice flour.

    Light flours include white rice flour and starches such as tapioca starch, corn starch and potato starch (not potato flour).

    A blend of medium and heavy flours combined with some starch to lighten and help bind the batter or dough seems to work best.

    Example (For breads, muffins, biscuits, cakes and cupcakes):

    Combine:

    1 cup sorghum flour
    1/2 cup millet, almond or buckwheat flour
    1 cup tapioca, potato or corn starch
    1 teaspoon xanthan gum

    Ready-made flour mixes include: Glutagon, Orgran and Entice and can be found at some large food chains, such as Pick ‘n Pay, health food shops and Dischem.

    Daniela Govetto of Daisy Health Foods and Entice says, “We focused on rice for our flour because it is totally digestible and digests without fermentation. That way, a person with a food allergy will not experience any symptoms during digestion.” 

    Egg: 

    In a cake, for example, the eggs serve as a leavening agent, helping to make the cake light and fluffy. In baked goods such as biscuits and muffins, the eggs add moisture and act as a binder, gluing all the other ingredients together.

    Generally, the fewer eggs a recipe calls for, the easier they will be to substitute. If a biscuit recipe calls for one egg, using an egg substitute will work much better than in a recipe that requires three or four eggs.

    An Egg Replacer, such as that made by Ogran, is very versatile and is available in most health food stores and Dischem. It works best in baked goods, such as biscuits, muffins and cakes, by following the directions on the packaging.

    Ground flax seeds can be used for binding by mixing two tablespoons with 1/8 teaspoon baking powder and three tablespoons water for each egg called for.

    Bananas and applesauce add the perfect amount of thick moisture, like eggs, but they don’t help dishes to rise or to become light and fluffy. Baking powder and baking soda is needed in these recipes.

    Tofu can be used in recipes such as quiches as the texture is similar to that of eggs. Use 1/4 cup tofu for every egg replaced and add some extra baking powder.

    Tuesday, July 26, 2011

    Baked Strawberry Cheesecake (Gluten free)


    Two words that make me very happy - cheese and cake... They make you happy too, don't they? Huh? Huh?

    (Due to my intolerances, I haven't been able to enjoy these two "words" much. BUT, a few weeks ago I had my allergies retested and the levels of my intolerances were much lower, some have even been eradicated, except for gluten.) 

    Time for cheese and cake, I'd say!

    Keeping with the theme of gluten free cheesecakes, I wanted to make something extra special.

    The special ingredient I decided to use in the base of my cheesecake was Nomu's Sweet Rub. (Excellent idea, if I could find it!) I just knew that the sweet, vanillary, spicy combination would complete my cheesecake and compliment the strawberry compote.

     
    Pic taken from website

    Cue "The Great Sweet Rub Run."

    ACT 1
    SCENE 1

    The scene opens to the baking isle of Pick 'n Pay in Constantia Village with a somewhat overeager Leaine casually looking for the sweet rub - but alas, no sweet rub to be found here.

    Pan across to Woolworths. 

    Leaine begins to panic slightly as she asks if they stock the Nomu sweet rub, only to be told that they do not.

    Leaine gets into her car and thinks of the next stop - being new to Cape Town only increases the challenge.

    Fade to black.

    SCENE 2

    The scene opens to the baking isle of Checkers, with a nervous Leaine, trying desperately to act casually and failing, as she runs up and down; a bead of sweat lingering on her forehead. You guessed it - no sweet rub here either.

    Close up of Leaine's face as the thoughts start racing through her head.

    Fade to black.

    SCENE 3

    Close up of Leaine's hands and phone.

    Finally, Leaine has a brain-wave and sends off a frantic tweet to @NoMUChirps "Paul, this is an emergency. Where can I buy your sweet rub?" Instant reply from @NoMUChirps "If it is urgent, Cape Quarter Spar or Giovanni's." 

    Close up of Leaine doing a happy dance.

    Fade to black.

    SCENE 4

    Awesome!! Leaine decides to phone the Spar just in case - lucky she did, as she was told that they do not have it in stock. As she dials Giovanni's, her heart is beating in her throat and she is silently sending out a message to the ether to please have it in stock. 

    We have a winner - Giovanni's is a life saver - the precious sweet rub is in stock.

    The relief is painted all over Leaine's face.

    Fade to black.

    SCENE 5

    A quick trek from Tokai to Seapoint and back (the things we do for the love of food) and Leaine is now ready to begin her cheesecake.

    The cheesecake works out amazingly well.

    Everyone claps and cheers.

    THE END

    Baked Strawberry Cheesecake

    Ingredients:

    Crust:
    125mls (1/2 cup) melted butter
    200g ground almonds (for added texture use 100g ground and 100g crushed)
    2tbs Nomu Sweet Rub


    Filling:
    4 large eggs
    1 cup fructose/ sugar
    75mls (5tbs) lemon juice
    Zest of 1 lemon (optional)
    3 x 250g tubs of smooth cottage cheese
    250mls (1 cup) cream
    125mls (1/2 cup) Glutagon cake flour
    1tsp Nomu vanilla extract


    Method:
    Preheat the oven to 180 °C 
    Grease a round 23 cm loose-bottom cake tin with a little of the melted butter
    Mix the remaining butter with the ground almonds and press the mixture onto the bottom of the cake tin 
    Whisk together the eggs and sugar for about 10 minutes or until pale yellow 
    Add the lemon juice while beating 
    Stir in the cottage cheese, cream, lemon zest and flour and mix well 
    Pour the mixture into the prepared tin and bake for 10 minutes 
    Reduce the temperature to 140 °C and bake for 1 hour or until the filling has set 
    Switch off the oven and leave the cheesecake to cool in the oven

    Strawberry Compote:

    Ingredients:
    250g strawberries, chopped
    2tbs Verlaque Honey Infused Balsamic Reduction (Wild Flower Honey and Rooibos)
    2tbs fructose/ sugar
    1/4tsp Nomu vanilla extract


    Method:
    Add all ingredients to a pan and cook until the strawberries have softened and become jam-like
    Allow to cool and spread over the cheesecake


      Tuesday, July 5, 2011

      Lemon and Honey Fridge Cheesecake (Gluten Free)


      Yesterday, I was asked if I had a recipe for a gluten and sugar free cheesecake by a lady who was craving cheesecake, but needed to be good. There is a recipe for a mock lemon cheesecake on my blog already, but I decided to rise to this challenge and enlisted the help of personal chef, Neill Anthony.

      Together, we came up with this little masterpiece and it tasted pretty damn awesome, if I do say so myself!! :)


      Lemon and Honey Fridge Cheesecake (Gluten Free):

      Ingredients:

      Crust:
      125mls (1/2 cup) melted butter
      200g ground almonds


      Filling:
      2 x 250g tubs smooth cream cheese
      200mls honey
      Zest of 1 lemon
      Juice of half a lemon
      250mls cream
      5 leaves of gelatine soaked in cold water
      50g fructose

      Method:

      Toast ground almonds in a dry pan on the stove until golden
      Add the melted butter to the ground almonds and press the mixture onto the bottom of a loose-bottom cake tin
      Place the tin in the fridge to allow the base to set while you prepare the filling
      Combine cream cheese, 100mls honey, lemon juice and lemon zest
      Whisk 200mls cream to soft peak state and fold into the cream cheese mixture
      Heat the remaining honey and fructose on the stove for about 10 minutes until it becomes almost caramel-like
      Cool down the honey a bit with the remaining cream and briskly mix in the squeezed out gelatine
      Mix some of the cream cheese mixture into the gelatine mixture and slowly transfer this new mixture into the original cream cheese mixture, folding all the time to prevent lumps
      Pour the mixture into the cake tin and allow to set for a minimum of 4 hours in the fridge
      Serve with a drizzle of honey and a grating of lemon zest

      Wednesday, June 29, 2011

      Apple and Almond Cake (Vegan and Gluten Free)


      When I first read that the amazing Nina from My Easy Cooking was hosting a Monthly Mingle and her chosen theme was Apple Affection, I knew I had to take part and I knew exactly what I was going to make

      an Apple and Almond Cake!!

      I found this super simple recipe on What Kim Ate (and Grew)'s blog.

      This cake is moist with a subtle hint of lemon and warm spices and has a delightful crunch from the almonds. The texture is wonderful and it has been added to my ever growing list of baked items that I could eat all the time, this list includes the gooey chocolate brownies that I blogged about at the beginning of the month.

      My perfect winter Sunday lunch would consist of Beef Bourguignon and this Apple and Almond cake.

      What utter, indulgent bliss :)

      Apple and Almond Cake:
      (makes 1 standard size cake)

      Ingredients:

      • 4 cups peeled, cored, and coarsely chopped Golden Delicious apples (about 4 medium)
      • 1 3/4 cups sugar (or fructose)
      • 1/2 - 1 tsp chopped dried lemon peel
      • 1/2 cup canola or other mild vegetable oil
      • 1/2 cup cup red currant jam, at room temperature (I used St. Dalfour Red Raspberry Jam)
      • 1/2 tsp pure vanilla extract
      • 1/2 tsp almond extract
      • 2 cups all-purpose flour (I used Glutagon cake flour)
      • 2 tsp baking soda (I used 1 tsp baking powder and 1 tsp bicarb of soda)
      • 1 tsp ground cinnamon
      • 1/2 teaspoon nutmeg (I used all spice)
      • 1/2 teaspoon salt
      • 1 cup chopped blanched almonds (I used half cup chopped almonds and half cup ground almonds)
      • Icing sugar (optional)

      Method:

      1. Preheat the oven to 175C. Grease a 33 by23 cm baking pan. In a large bowl, combine the apples, sugar, and lemon peel; let stand for 15 minutes.
      2. Add the oil, jam, vanilla extract, and almond extract to the apple mixture; stir until the jam is well dissolved.
      3. In another large bowl, sift together the flour, baking soda, cinnamon, nutmeg/ all spice and salt. Gradually stir into the apple mixture. Add the almonds, stirring well to combine. Pour into the prepared pan and bake until a toothpick inserted in the center comes out clean, 45 to 50 minutes.
      4. Let the cake cool in the pan on a wire rack. When completely cooled, sprinkle with confectioners’ sugar, if desired.
      Advance Preparation

      The completely cooled cake can be covered with foil and stored at room temperature for up to two days.

      Tuesday, June 28, 2011

      Boeuf Bourguignon and The Wonderbag

       
      Julia Child described it as "certainly one of the most delicious beef dishes concocted by man."

      The movie Julie and Julia resurrected this "peasant" dish into something of a fashion statement - if you hadn't heard of Boeuf Bourgignon; if you hadn't made it; if you hadn't eaten it - where had you been??

      Well maybe I had been living under a rock because although I had eaten this fabulously rich and powerfully robust dish on numerous occasions - I hadn't made it, ever! That is, until this weekend...

      When winter comes a-calling, my summer mind disappears and is replaced by a very one-track one that only wants comfort food! Slow cooked, delicious smelling, belly warming, toe curling yumminess - eaten close to a fireplace, preferably, while savouring a glass of red wine.

      Boeuf Bourgignon sums up winter in one dish.

      A few weeks ago, I was approached by a company called Natural Balance to review their product The Wonderbag, which is a heat retention/insulation cooker that looks like a hollowed out bean bag with a separate bean bag lid and a draw string.


      When I first received my Wonderbag, I wondered how this bean bag, with its expanded polystyrene (EPS) balls, would retain enough heat to cook the food in the pot. I decided to put the bag to the test, with what was going to be the best stew I had ever made. EVER!!

      Boy, was I impressed, The Wonderbag really works, hence the name - it is a wonder!

      All that is needed to be done is to bring the pot of food to the boil, a stew requires about 30 minutes on the stove or in the oven, and then to transfer the pot to the Wonderbag; sealing in everything tightly, so that the heat does not escape, until the dish is ready to be eaten. (Do not open the bag until the food is cooked as the Wonderbag will not be able to do its job correctly.)

      Not only does this amazing product save electricity, which is a huge benefit during winter in South Africa, (not forgetting the ever escalating electricity prices), but each one is manufactured by a previously unemployed skilled seamstress living in the Riebeek Valley. Every Wonderbag gives someone an income to feed and educate a family. It also saves energy, saves money and reduces the amount of carbon released into the atmosphere. Wonderbag is registered with the UNFCCC (United Nations Climate Change) as a CDM (Clean Development Mechanism) and is in a carbon trading relationship with Nedbank.

      By using a Wonderbag two to three times a week you can save:

      •1.6 litres of paraffin a week

      •13kWh of electricity a week

      •500 kg of carbon per year

      To find out more about this product, please visit their websites: Natural Balance and Goedgedacht.

      Saturday seemed like the perfect day to make my Boeuf Bourgignon - I wanted to cook is slowly for many, many hours so that the meat would fall apart and the gravy would be intensely flavoursome.

      *WARNING* Do not attempt to make this if you are planning on entertaining the same night - the best bet would be to make it the night before serving.

      The recipe I used is from Simply Recipes and is based on Julia Child's recipe.

      Boeuf Bourguignon
      (Serves 6 to 8)

      Ingredients:

      • 170g bacon (I used 2 deboned pork rashers)
      • 2 - 3 Tbsp olive oil (if required)
      • 1.8kgs beef cubes (I used goulash), patted dry with paper towels
      • Salt and freshly ground black pepper
      • 2 cups sliced onions
      • 1 cup sliced carrots
      • 1 bottle of red wine (pinot noir, shiraz)*
      • 2 cups beef stock (I used Nomu)
      • 1 cup chopped tomatoes, fresh or tanned (I used 2 Tbsp tomato paste)
      • 1 medium bouquet garni: 8 parsley sprigs, 1 large bay leaf, 1 tsp dried thyme, 2 whole cloves and 3 large lightly crushed cloves of garlic (I used 2-3 sprigs fresh thyme, bay leaves, cloves and lightly crushed garlic all placed in separately)
      •  Beurre manié: 3 Tbsp flour blended to a paste with 2 Tbsp butter (I used corn starch and you may also use dairy free margarine such as Blossom instead of the butter)
      • 24 pearl onions
      • Chicken stock or water
      • Butter/ margarine
      • 680g button or porcini mushrooms
      *Contains yeast

      Method:

      1. Blanch the bacon to remove its smoky taste. Drop bacon slices into 2 litres of cold water, bring to a boil, and simmer 6 to 8 minutes. Drain, rinse in cold water, and dry on paper towels.
      2. Remove the rind from the rashers and cut the rest into cubes. In a large frying pan, sauté the rind and cubes of bacon/ rasher to brown slightly (I didn't use oil here, I found the rashers had enough fat). Set aside.
      3. Brown the chunks of beef on all sides in the bacon fat and olive oil, season with salt and pepper, and put them into a heavy-bottomed Dutch oven or casserole dish. Add the bacon to the beef.
      4. Remove all but a little fat from the frying pan, add the sliced vegetables and brown them, and add to the meat.
      5. Deglaze the pan with wine (Here I heated the entire bottle of wine in the pan to burn off most of the alcohol, after deglazing), pouring it into the casserole along with enough stock to almost cover the meat. Stir in the tomatoes and add the herb bouquet.
      6. Bring to a simmer, cover, and simmer slowly on the lowest heat possible, either on the stove or in a preheated 160°C oven, until the meat is tender, about 1 to 2 hours. (Here I put the casserole dish in the oven on about 180°C for half an hour and then transferred it to my Wonderbag to cook over night +/- 8 hours)
      7. While the stew is cooking (or the next day), prepare the onions. Blanch the onions in boiling water for 1 minute. Drain and rinse in cold water to stop the cooking. Slice the end tips off of the onions, peel the onions and score the root end with 1/4 cm cuts. Sauté onions in a single layer in a tablespoon or two of butter until lightly browned. Add chicken stock or water half way up the sides of the onions. Add a teaspoon of sugar, and season with salt and pepper. Cover and simmer slowly for 25 minutes or until tender. The onions should absorb most of the water. If there is water remaining after cooking, drain the excess. Set aside.
      8. Prepare the mushrooms a few minutes before serving the stew. Sauté quartered mushrooms in a few tablespoons of butter and olive oil until browned and cooked through.
      9. When the stew meat has cooked sufficiently, remove all solids from the sauce (except the beef) by draining through a colander set over a saucepan. Return the beef to the casserole. Press juices out of the residue into the cooking liquid, then remove any visible fat and boil down the liquid to 3 cups. Off heat, whisk in the beurre manié, then simmer for 2 minutes as the sauce thickens lightly. Correct seasoning and pour over the meat, folding in the onions and mushrooms. To serve, bring to a simmer, basting meat and vegetables with the sauce for several minutes until hot throughout.
      10. Traditionally served with boiled baby potatoes, but can be served with rice or mash too
      Finally after about 18 hours of preparation and cooking I was able to taste the fruits of my labour. Trumpets began to sound and violins began to play as I slowly lifted the spoon to my mouth, breathing in the heady aromas, and took my first mouthful of the velvety, intoxicating gravy and bit into a tender piece of meat (my mouth is watering as I write this).

      Now, I see what the fuss is all about, Julia!! I am officially a self-cook Boeuf Bourguignon fan... for life.

      I will be trying out a different recipe soon - I can't seem to get enough and want everyone to experience this unique dish for themselves. It is well worth the effort!!

      Please cook this for the special people in your life; I can guarantee that they will love you forever :)

      Monday, June 13, 2011

      Gooey Chocolate Brownies


      The Craving: Brownies, warm out of the oven, dripping with gooey chocolate and studded with walnut pieces
      The Challenge: To make said brownies free from gluten, dairy and eggs
      The Answer: Cookbook "Vegan Cupcakes Take Over The World" by Isa Chandra Moskowitz & Terry Hope Romero

      I am the type of person who thinks about food A LOT - I dream about it, day dream about it, Google it, ramble about it, stare at it, convince others to try it and devour it.

      If you have been following my blog recently you will have noticed that there haven't been many recipes this year and that is because this passion dimmed a bit, what with everything happening in my life... I haven't been waking up in the middle of the night with cold sweats and wildly beating heart as inspiration suddenly engulfed me.

      {I was seriously beginning to think there was something wrong with me!}

      Until...

      THE CRAVING hit me, BAM, right in the taste buds!

      It was an ordinary day at work; I was innocently minding my own business, when suddenly this tidal wave of a craving sent my taste buds salivating, my heart racing, my palms sweating, my brain whizzing... I had to have a brownie and I had to have it NOW!

      Well I couldn't have it then and there, I had to be patient and wait until the end of the day... Tick, tock, tick, tock - it seemed to be one of the longest days EVER!

      TOOOCCCKKKK... home time! I jumped in my car, raced home, clambered up the stairs, bashed through the front door and pounced on the cookbook - there had to be a brownie recipe, there just had to be!

      Victory... "Brooklyn Brownie Cupcakes"

      I scoured the list of ingredients, yanked open the cupboards to see what I had and with cookbook in hand, raced out of the door again and hot-footed it to the shops.

      Now, breathless and drooling slightly at the thought of the brownie that was within my grasp at last, I started to make the batter:

      *Calming breaths everyone*

      INGREDIENTS:

      (Makes about 10 - 12 brownies or 15 cupcakes)

      2/3 cup semisweet chocolate chips (I used Lindt Piccoli Couverture 70% dark chocolate discs)*
      1/4 cup soya yoghurt (I used the chunky cherry soya yoghurt from Woolies)
      1/2 cup black cherry preserve (I used Morello cherry jam)
      1/2 cup soya milk
      3/4 cup granulated sugar
      1/2 cup canola oil
      1 teaspoon vanilla extract
      1/2 teaspoon almond extract
      2 tablespoons bourbon or any whiskey
      1 cup plus 2 tablespoons all-purpose flour (I used Glutagon Cake Flour)
      1/4 cup cocoa powder
      1 teaspoon baking powder
      1/2 teaspoon baking soda
      1/4 teaspoon salt
      1/4 cup chopped walnuts

      *May contain small traces of gluten and dairy

      DIRECTIONS:
      1. Preheat oven to 180 degrees Celsius
      2. Spray a loaf tin or any other rectangular baking dish with spray 'n cook (unless you would like to make cupcakes, in which case, line a muffin pan with cupcake liners and spray each line with spray 'n cook)
      3. At this point the recipe tells you to melt the chocolate, I didn't, I left the discs whole and put them in at the end
      4. Mix the yoghurt, jam, soya milk, sugar, oil, vanilla, almond extract and whiskey in a large bowl
      5. Sift in the flour, cocoa, baking powder, baking soda and salt
      6. Mix thoroughly - I just used a spatula
      7. Pour in the Lindt discs and crumble in some walnut pieces
      8. Mix again, but do not over mix
      9. Pour into the loaf tin
      10. Bake for about 25 - 30 minutes
      11. Tip out of the tin and allow to cool on a wire rack before cutting into squares


      THE RESULT: My brownie craving was sated! This recipe is so delicious, exactly what I was looking for; I couldn't even tell that the brownie didn't contain eggs, dairy or gluten. It was light and fluffy and somewhat cakey, but the gooeyness from the chocolate, made my day! I have been devouring my way through these brownies with glee and have even managed to freeze some. I will most definitely make this recipe again. A huge thumbs up from me!

      Wednesday, June 8, 2011

      Review: The Roundhouse


      When the weather is miserable there is nothing better to do than eat! And this is exactly what we did last Sunday.

      Felchin Chocolate Fondant with Seville Orange Ice Cream and Creme Anglaise
      (The Creme Anglaise is ceremoniously poured at the table by the waiter)

      The road to The Roundhouse in Camps Bay is long and winding (I feel a song coming on), but this road does nothing to deter you, in fact with each turn and twist, edged with age-old trees, I felt my excitement mounting and on arriving at this tucked away gem, the view, simply, took my breath away.

      I was in awe as history seemed to unfold before my mind's eye.

      Then
      (Taken from the web)

      Now
      (Taken from the web)

      In fact, while walking into the restaurant, I could imagine myself in a black and white movie - so transported to a bygone era was I.

      Our friends were tucked away in an alcove, which immediately gave a sense of privacy, almost as if I was visiting a friend's home for lunch (A very rich friend with a well-oiled contingent of staff).

      The Maitre d' was superb - explaining the intricacies of each dish and providing recommendations. We all decided to go with the "Express Lunch Menu", which consisted of three courses, with two choices for each.

      Menu R180 or Menu with Pairing R345.

      Most of us opted for the recommendations:

      STARTER: Lezena Free Range Chicken Terrine and Parfait with Nasturtium Berry Tapenade, Eve Figs and Pine


      The chicken was unbelievably tender and moist and the accompanying flavours and textures took my taste buds on a journey, with each mouthful being a new avenue to explore and savour.

      MAIN: 24 Hour Lamb Shoulder with Charred Aubergine, Radish and Fennel


      The charred aubergine and strong flavours of radish and fennel complimented this robust dish excellently. The lamb was melt in the mouth and the gravy unctuous.

      DESSERT: Almond Frangipane with Vanilla Creme, Marzipan and Chocolate Croquant


      The flavours struck an individual cord, yet harmonized brilliantly. I adored the tiny balls of marzipan, the crunchy shards of dark chocolate and the delicate almond frangipane.

      Each dish was accompanied by heavenly wines, (chosen by one of my learned dining companions); a wooded, almost syrupy, chardonnay for the starter and a deep, powerful red blend for the main.

      If this is what it feels like to be royalty, bring it on!
      ...
      Prince Harry, where are you? ;-)